Annotation Tasks
Use the Annotations page to access and manage annotation Tasks.
Use annotation tasks to efficiently organize the annotation of frames in Dataset versions and manage the work of annotators (see Annotating Images and Videos).
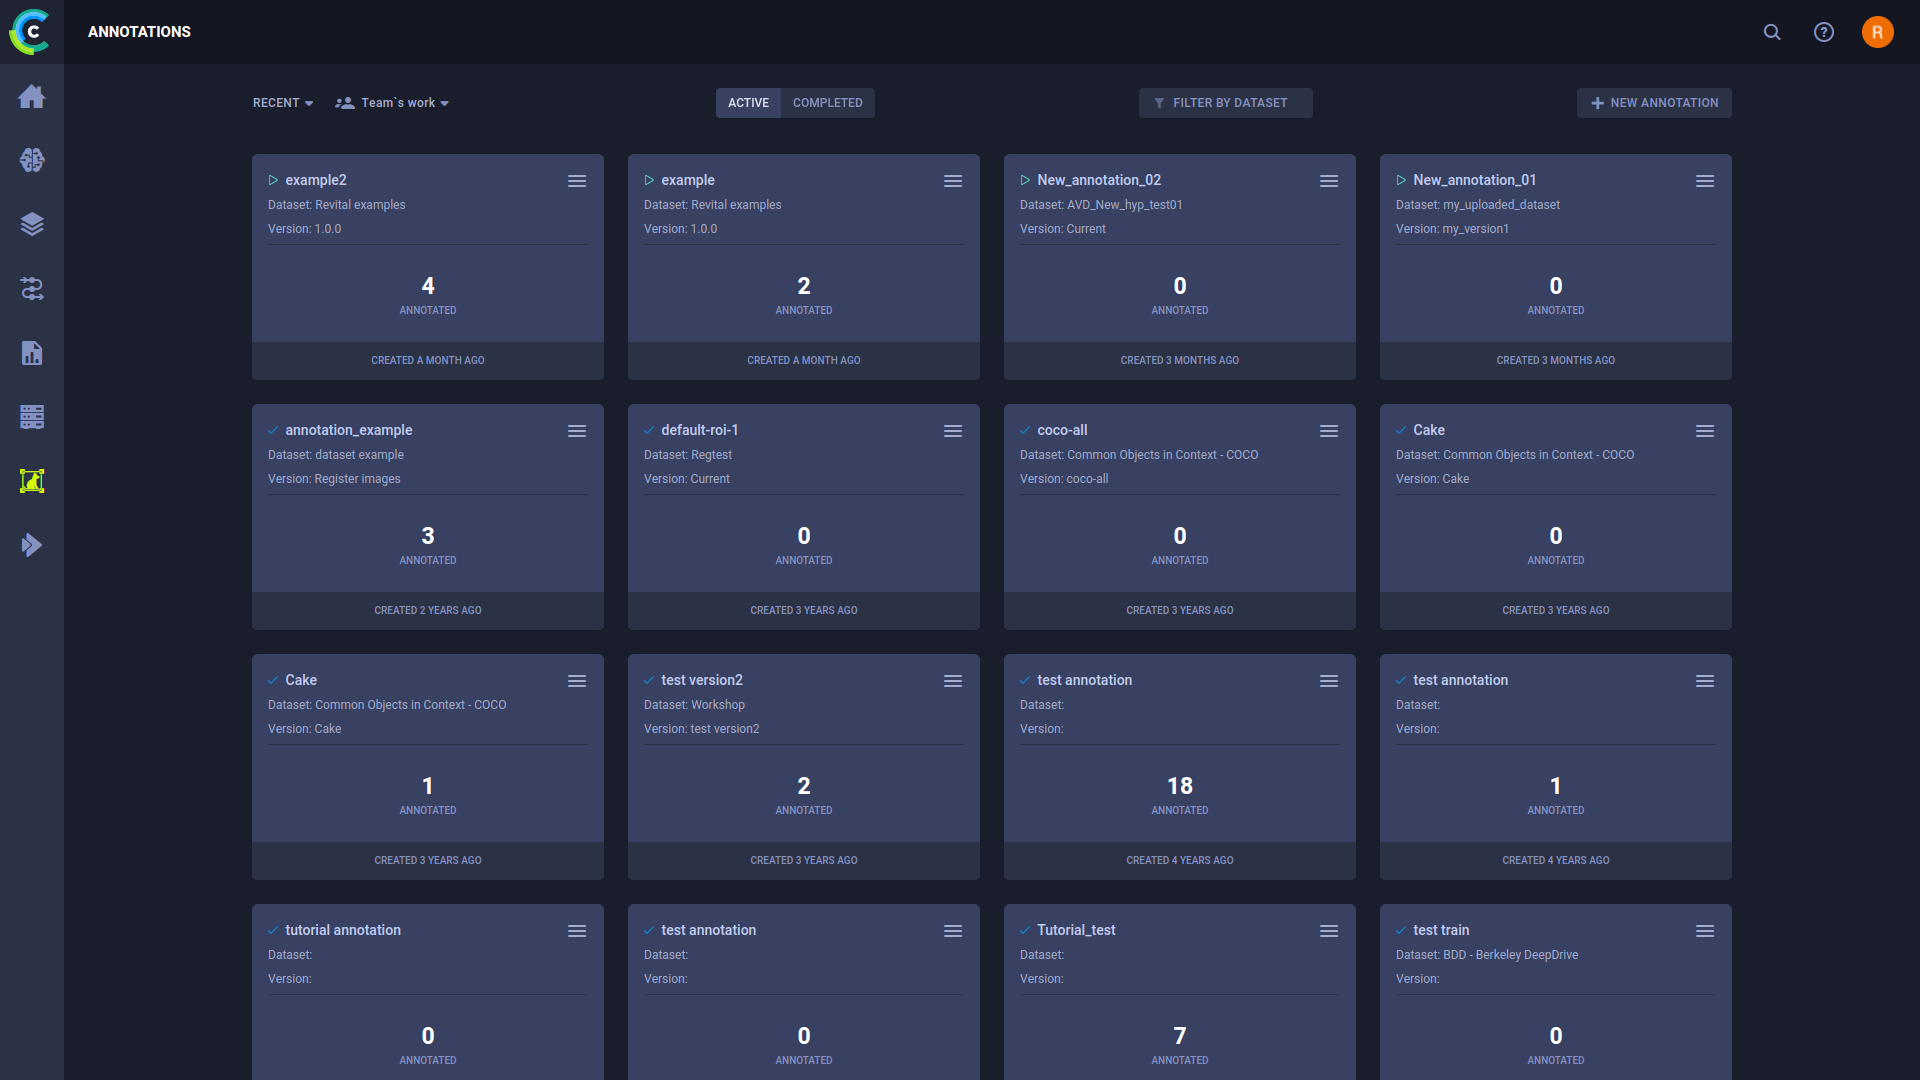
Click on an annotation task card to open the frame viewer, where you can view the task's frames and annotate them.
Annotation Task Actions
Click ![]() on the top right
of an annotation task card to open its context menu and access annotation task actions.
on the top right
of an annotation task card to open its context menu and access annotation task actions.
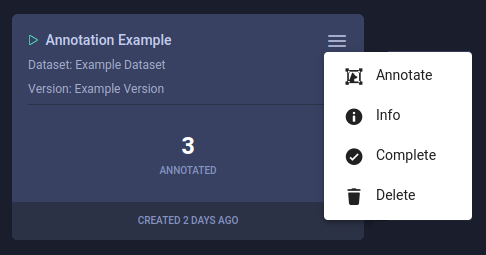
- Annotate - Go to annotation task frame viewer
- Info - View annotation task's definitions: dataset versions, filters, and frame iteration specification
- Complete - Mark annotation task as Completed
- Delete - Delete annotation task
Page View Options
The following are options for filtering annotation tasks:
- Active / Completed Filter - Toggle to show annotation tasks that are either Active or Completed
- Dataset Filter - Use to view only the annotation tasks for a specific Dataset
- My / Team Work - Toggle to show annotation tasks that either only you created or any team member created
Sort the annotation tasks by either using RECENT or NAME option.
Creating Annotation Tasks
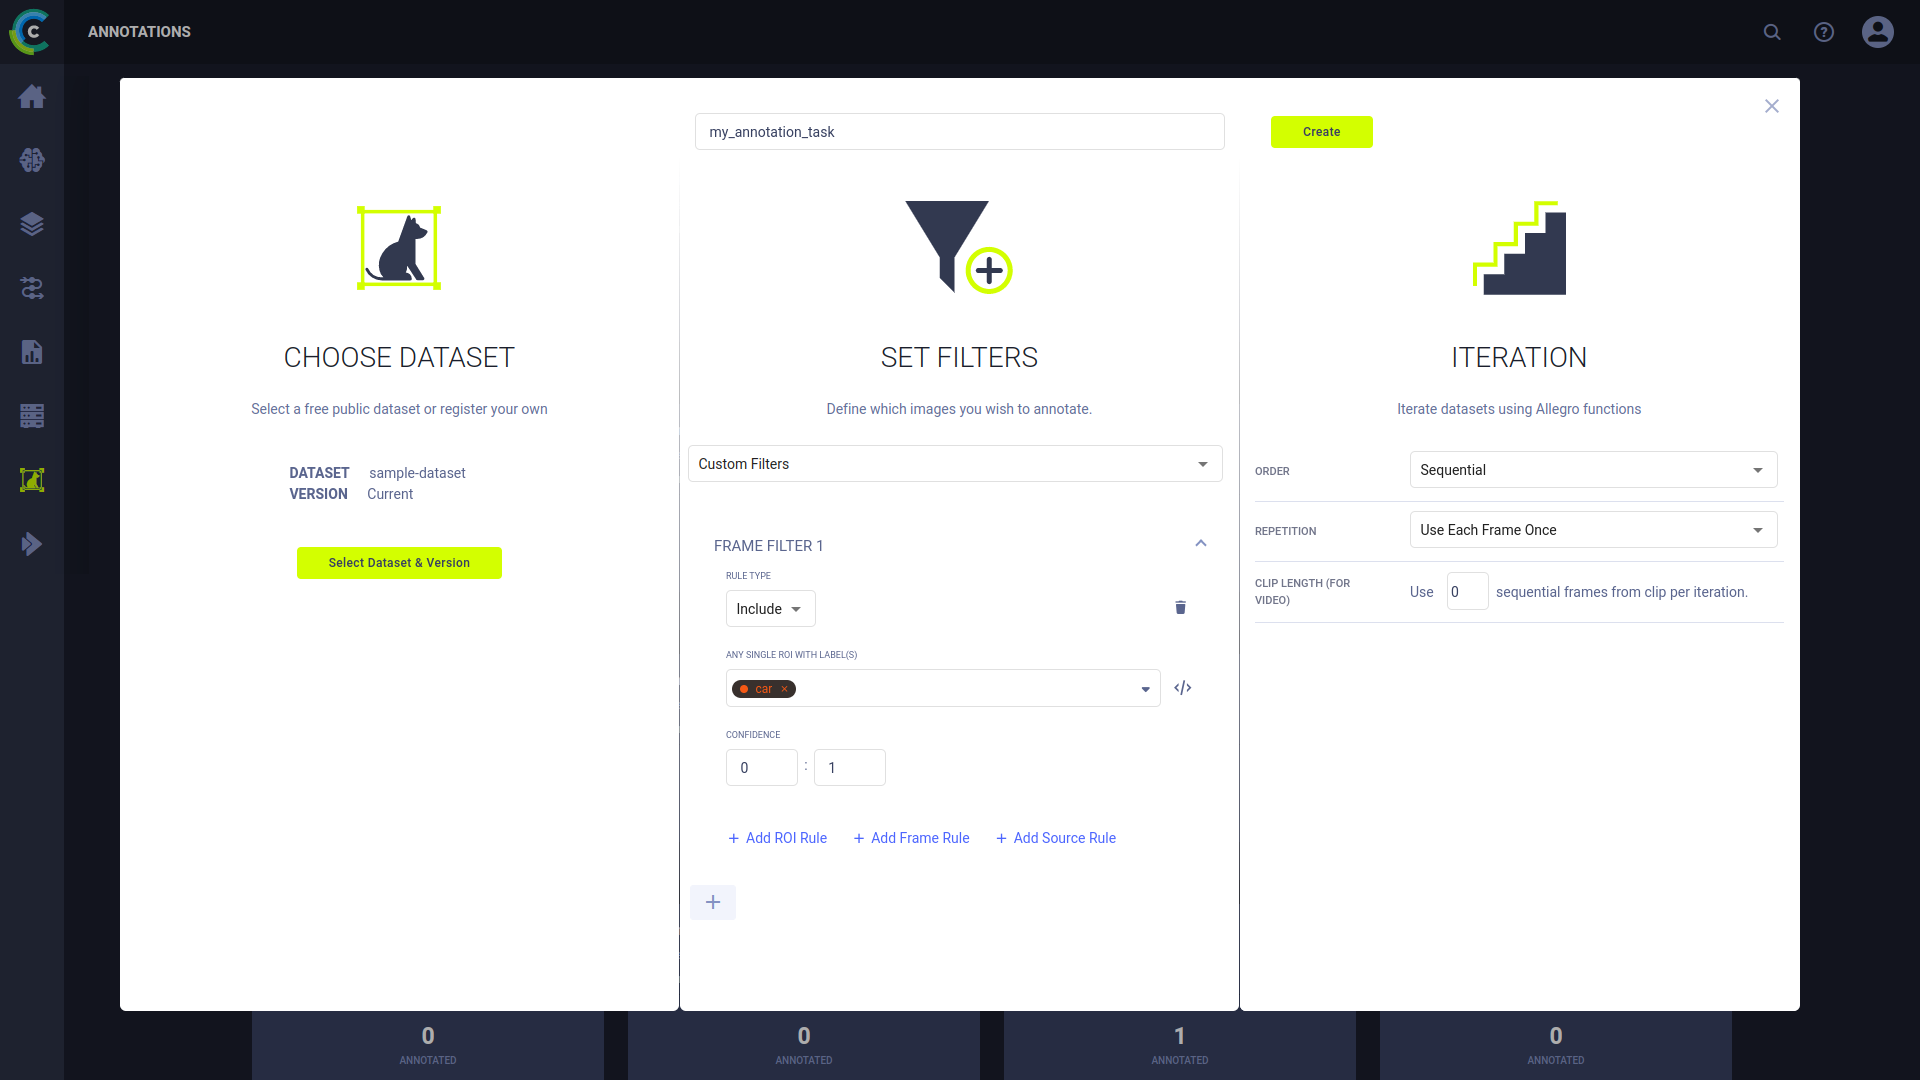
To create an annotation task:
On the Annotator page, click + NEW ANNOTATION.
Enter a name for your new annotation task.
Choose a Dataset version to annotate. If the selected Dataset version's status is Published, then creating this annotation task also creates a child version of the selected version. The new child version's status is Draft, and its name is the same as the annotation task.
Set the filters for the frames this annotation task presents to the annotator.
In the SET FILTERS list, choose either:
- All Frames - Include all frames in this task.
- Empty Frames - Include only frames without any annotations in this task.
- Custom Filters - Apply any combination of ROI, frame, and source filtering rules. See Advanced Frame Filtering.
Choose the iteration parameters specifying how frames in this version are presented to the annotator.
In ITERATION, in the ORDER list, choose either:
- Sequential - Frames are sorted by the frame top-level
context_id(primary sort key) andtimestamp(secondary sort key) metadata key values, and returned by the iterator in the sorted order. - Random - Frames are randomly returned using the value of the
random_seedargument. The random seed is maintained with the experiments. Therefore, the random order is reproducible if the experiment is rerun.
- Sequential - Frames are sorted by the frame top-level
In REPETITION, choose either Use Each Frame Once or Limit Frames. If you select Limit Frames, then in Use Max. Frames, type the number of frames to annotate.
If iterating randomly, in RANDOM SEED type your seed or leave blank, and the ClearML Enterprise platform generates a seed for you.
If annotating video, then in CLIP LENGTH (FOR VIDEO), type of the number of sequential frames per iteration to annotate.
Click Create.
Annotating Images and Video
Annotate images and video by labeling regions of interest in Dataset version frames. The frames presented for annotation depend upon the settings in the annotation task (see Creating Annotation Tasks).
Creating New Frame Objects
To draw a new annotation
Click one of the following modes to choose what annotation to create:
 - Rectangle mode: Click then drag the cursor to create a rectangle annotation on the frame.
 - Ellipse mode: Click then drag the cursor to create an ellipse annotation on the frame.
 - Polygon mode: Each click sets polygon vertices on the frame. Click again on the initial vertex to close the polygon.
 - Key points mode: Each click adds a keypoint to the frame. After clicking the last keypoint, click
  or
or Enterto save the annotation. ClickEscto cancel the annotation.A new annotation is created.
In the newly created annotation, select or type-in a label(s). Click the circle in the label name to select a different label color.
You can use the Default ROI Label(s) list to automatically set labels to all new annotations.
Copying Frame Objects
You can copy existing annotations, and paste them to any frame of your choice:
- Click the annotation or bounded area in the frame.
- Click
 (copy annotation).
 - Navigate to the frame of your choice (you can remain in the same frame).
- Click PASTE. The new annotation appears in the same location as the one you copied. You can paste the annotation multiple times.
Copy all annotations in a frame by clicking the COPY ALL button.
Annotation Actions
The following table describes the actions that can be performed on existing annotations. The frame editor automatically
saves changes when you move to another frame using the frame navigation controls
(![]() ,
, ![]() ,
, ![]() ,
, ![]() ,
, ![]() ,
, ![]() ,
or the arrow keys on the keyboard). Closing the frame editor will prompt you to save any changes.
,
or the arrow keys on the keyboard). Closing the frame editor will prompt you to save any changes.
| Icon (when applicable) | Action | Description |
|---|---|---|
| Move annotation | Click on a bounded area and drag it. | |
| Resize annotation | Select an annotation, then click on a bounded area's vertex and drag it. | |
| Edit metadata | Hover over an annotation in the list and click the icon to open the edit window. Input the metadata dictionary in JSON format. This metadata is specific to the selected annotation, not the entire frame. | |
| Lock / Unlock annotation | Click the button on a specific annotation to make it uneditable. You can also click the button on top of the annotations list to lock all annotations in the frame. | |
| Delete annotation | Click the annotation or bounded area in the frame and then click the button to delete the annotation. | |
| Show/hide all annotations | Click the button to view the frame without annotations. When annotations are hidden, they can't be modified. | |
| Delete label | In the relevant annotation, click x on the label you want to remove. |
Frame Labels
You can add labels which describe the whole frame, with no specific coordinates.
To add frame labels:
- Expand the FRAME LABELS area (below OBJECTS)
- Click + Add new
- Enter a label(s)
Frame Metadata
To edit frame metadata:
- Expand the FRAME METADATA area
- Click edit
 which will open an editing window
 - Modify the metadata dictionary in JSON format