ClearML Session CLI
clearml-session is a feature that allows to launch a session of JupyterLab and VS Code, and to execute code on a remote
machine that better meets resource needs. This feature provides local links to access JupyterLab and VS Code on a
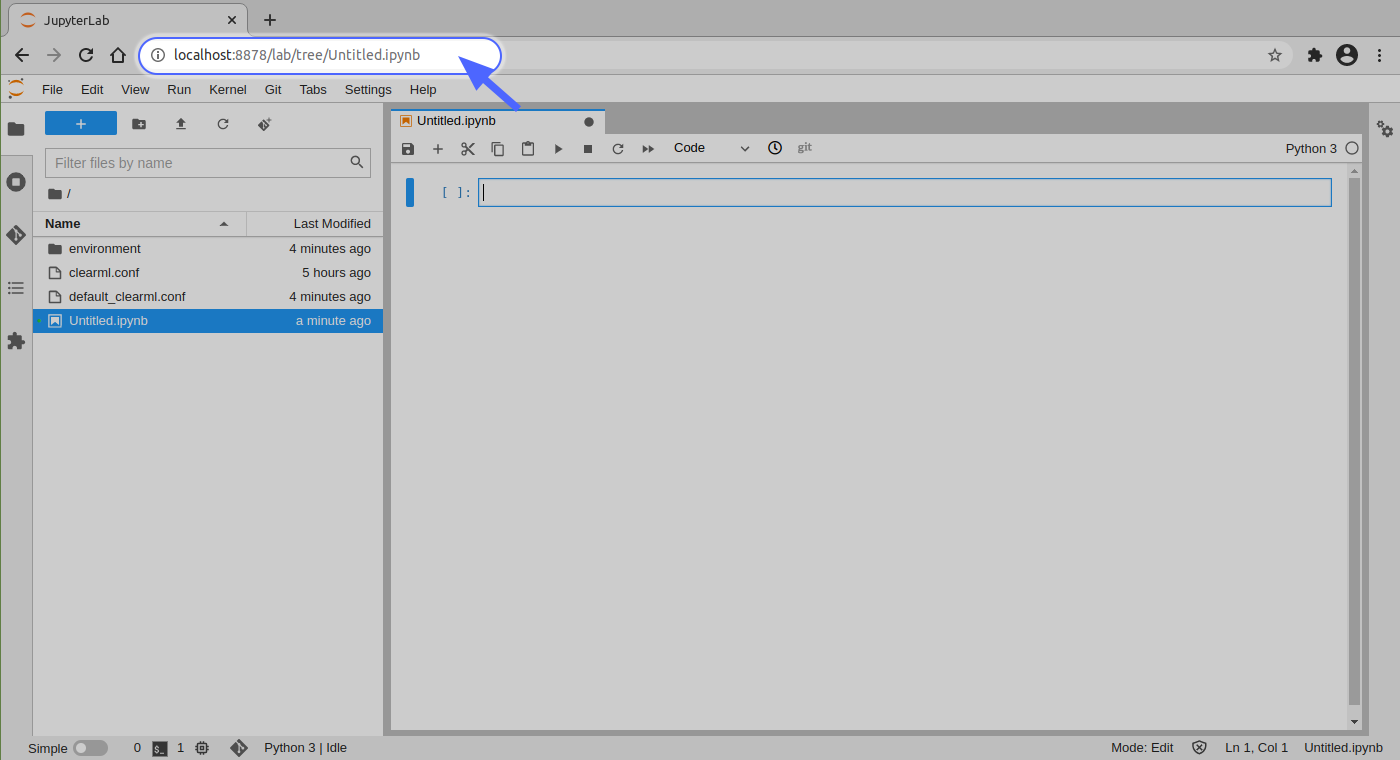
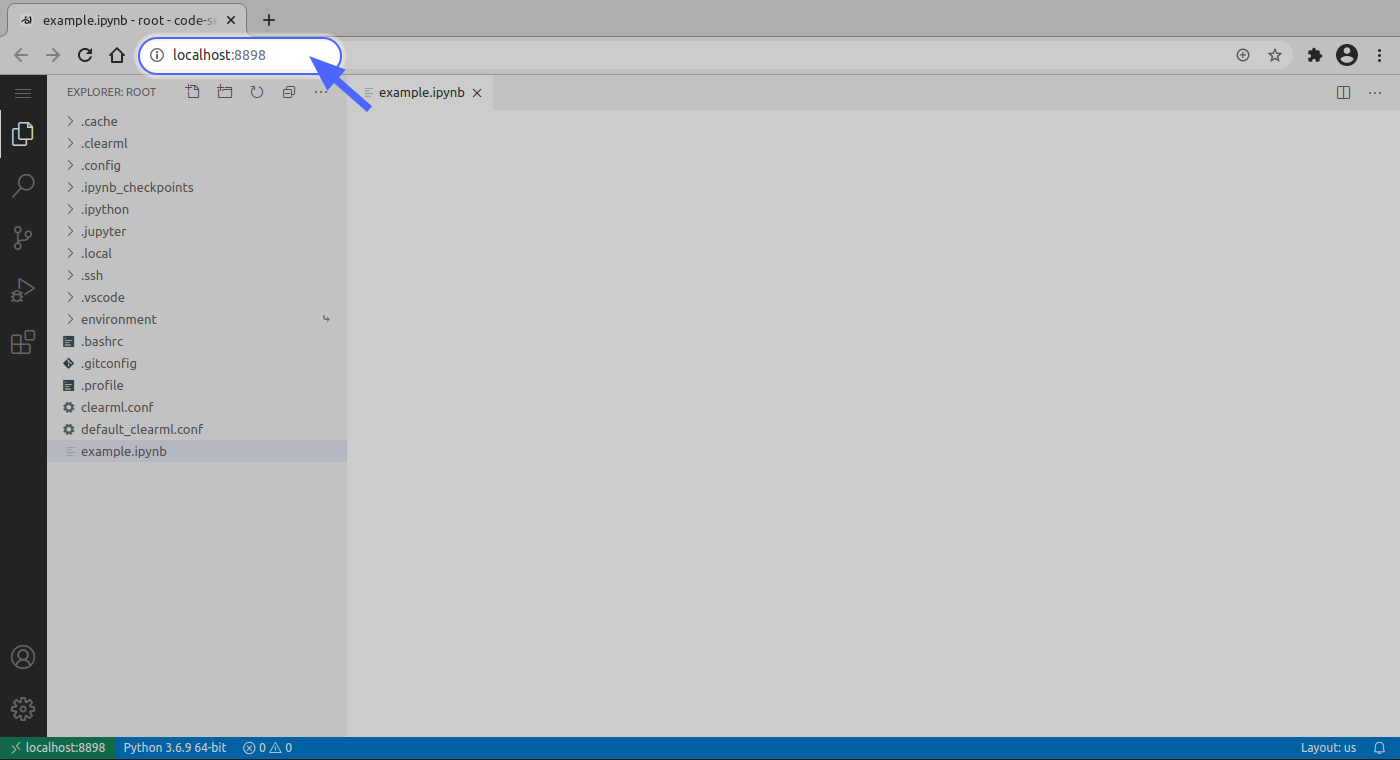
remote machine over a secure and encrypted SSH connection. By default, the JupyterLab and
VS Code remote sessions use ports 8878 and 8898 respectively.
Prerequisites
clearmlinstalled and configured. See Getting Started for details.- At least one
clearml-agentrunning on a remote host. See installation for details. - An SSH client installed on your machine. To verify, open your terminal and execute
ssh. If you did not receive an error, you are good to go.
Launching ClearML Session
Install
clearml-session:pip install clearml-sessionRun
clearml-session:clearml-sessionYou can add flags to set a Docker image, the remote SSH port, JupyterLab/VS Code versions, and more. See CLI options for all configuration options.
clearml-sessioncreates a new Task that is responsible for setting up the SSH and JupyterLab/VS Code environment according to your specifications on the host machine.Follow the
clearml-sessionsetup wizard:Select the queue- Choose the queue where the ClearML Session task will be enqueued. The agent assigned to this queue will set up and launch the remote server.Launch interactive session?- Clickyto launch the interactive session.
The session Task is enqueued in the selected queue, and a ClearML Agent pulls and executes it. The agent downloads the appropriate IDE(s) and launches it.
Once the agent finishes the initial setup of the interactive Task, the local
cleaml-sessionconnects to the host machine via SSH, and tunnels both SSH and IDE over the SSH connection. If a Docker is specified, the IDE environment runs inside the Docker.The CLI outputs access links to the remote JupyterLab and VS Code sessions:
Interactive session is running:
SSH: ssh root@localhost -p 8022 [password: <password>]
Jupyter Lab URL: http://localhost:8878/?token=<token>
VSCode server available at http://localhost:8898/
Notice the links are to
localhostsince all communication to the remote server itself is done over a secure SSH connection.Now start working on the code as if you're running on the target machine itself!
Re-launching and Shutting Down Sessions
If a clearml-session was launched locally and is still running on a remote machine, you can easily reconnect to it.
To reconnect to a previous session, execute clearml-session with no additional flags, and the option of reconnecting
to an existing session will show up:
Connect to active session id=c7302b564aa945408aaa40ac5c69399c [Y]/n?
If multiple sessions were launched from a local machine and are still active, choose the desired session:
Active sessions:
0*] 2021-05-09 12:24:11 id=ed48fb83ad76430686b1abdbaa6eb1dd
1] 2021-05-09 12:06:48 id=009eb34abde74182a8be82f62af032ea
Connect to session [0-1] or 'N' to skip
To shut down a remote session, which frees the clearml-agent and closes the CLI, enter "Shutdown". If a session
is shut down, there is no option to reconnect to it.
Connecting to an Existing Session
If a clearml-session is running remotely, you can continue working on the session from any machine.
When clearml-session is launched, it initializes a task with a unique ID in the ClearML Server.
To connect to an existing session:
- Go to the web UI, find the interactive session task (by default, it's in project "DevOps").
- Click the
IDbutton in the task page's header to copy the unique ID. - Run the following command:
clearml-session --attach <session_id>. - Click on the JupyterLab / VS Code link that is outputted, or connect directly to the SSH session
Features
Running in Docker
To run a session inside a Docker container, use the --docker flag and enter the docker image to use in the interactive
session.
Kubernetes Support
With ClearML k8s-glue you can enable launching ClearML sessions directly within Kubernetes pods. Set up the network and
ingress settings for clearml-session in the sessions section of the values.yaml
file.
Make sure to set the following values:
- Set
portModeEnabled: trueto allow sessions to run directly from a pod svcType- Set the service type to eitherNodePortorLoadBalancer. Note that if set toNodePort, theexternalIPmust be set to the IP of one of the workers. If set toLoadBalancer, you need to have a LoadBalancer and external IP address set up in advance, before applying the chartexternalIP- Define an external IP address that the client will connect to. Note that this external IP needs to be set up in advance.maxServices- The maximum number of sessions the agent will spawn
For example:
# -- Sessions internal service configuration
sessions:
  # -- Enable/Disable sessions portmode WARNING: only one Agent deployment can have this set to true
  portModeEnabled: true
  # -- specific annotations for session services
  svcAnnotations: {}
  # -- service type ("NodePort" or "ClusterIP" or "LoadBalancer")
  svcType: "NodePort"
  # -- External IP sessions clients can connect to
  externalIP: 0.0.0.0
  # -- starting range of exposed NodePorts
  startingPort: 30000
  # -- maximum number of NodePorts exposed
  maxServices: 20
For more information, see Kubernetes.
Installing Requirements
clearml-session can install required Python packages when setting up the remote environment.
Specify requirements in one of the following ways:
- Attach a
requirement.txtfile to the command using--requirements </file/location.txt>. - Manually specify packages using
--packages "<package_name>"(for example--packages "keras" "clearml"), and they'll be automatically installed.
Accessing a Git Repository
To access a git repository remotely, add a --git-credentials flag and set it to true, so the local .git-credentials
file is sent to the interactive session. This is helpful if working on private git repositories, and it allows for seamless
cloning and tracking of git references, including untracked changes.
Uploading Local Files to Remote Session
You can upload local files and directories from your local machine into the remote session by specifying their path with
--upload-files <file_path>. The entire content of the directory or file will be copied into your remote
clearml-session container under the ~/session-files/ directory.
clearml-session --upload-files /mnt/data/stuff
You can upload your files in conjunction with the --store-workspace option to easily move workloads between local
development machines and remote machines with persistent workspace synchronization. See Storing and Synchronizing Workspace.
Starting a Debugging Session
You can debug previously executed experiments registered in the ClearML system on a remote interactive session.
Input into clearml-session the ID of a Task to debug, then clearml-session clones the experiment's git repository and
replicates the environment on a remote machine. Then the code can be interactively executed and debugged on JupyterLab / VS Code.
The Task must be connected to a git repository, since currently single script debugging is not supported.
- In the ClearML web UI, find the experiment (Task) that needs debugging.
- Click the
IDbutton next to the Task name, and copy the unique ID. - Enter the following command:
clearml-session --debugging-session <experiment_id_here> - Click on the JupyterLab / VS Code link, or connect directly to the SSH session.
- In JupyterLab / VS Code, access the experiment's repository in the
environment/task_repositoryfolder.
Storing and Synchronizing Workspace
You can store and sync your interactive session workspace with the --store-workspace option. clearml-session
will automatically create a snapshot of your entire workspace when shutting it down, and later restore in a
new session on any remote machine.
Specify the remote workspace root-folder by adding --store-workspace <workspace_root_folder> to the command line. In
the remote session container, put all your code and data under the <workspace_root_folder> directory. When your
session is shut down, the workspace folder will be automatically packaged and stored on the ClearML file server.
clearml-session --store-workspace ~/workspace
In your next clearml-session execution, specify --store-workspace <workspace_root_folder> again and clearml-session
will grab the previous workspace snapshot and restore it into the new remote container in <workspace_root_folder>.
clearml-session --store-workspace ~/workspace
To continue a specific session and restore its workspace, specify the session ID with --continue-session <session_id>:
clearml-session --continue-session <session_id> --store-workspace ~/workspace
Command Line Options
| Command line options | Description | Default value |
|---|---|---|
--attach | Attach to running interactive session | Previous session |
--base-task-id | Pass the ID of a task that will become the base task, so the session will use its configurations | none or the previously entered base task |
--config-file | Specify a path to another configuration file for clearml-session to store its previous state | .clearml_session.json or previously entered configuration file |
--continue-session | Pass the session of a previous session to continue, restoring your workspace (see --store-workspace) | none |
--debugging-session | Pass existing Task ID, create a copy of the experiment on a remote machine, and launch Jupyter/SSH for interactive access. Example --debugging-session <task_id> | none |
--disable-session-cleanup | If True, previous interactive sessions are not deleted | false |
--docker | Select the docker image to use in the interactive session | nvidia/cuda:11.6.2-runtime-ubuntu20.04 or previously used docker image |
--docker-args | Add additional arguments for the docker image to use in the interactive session | none or the previously used docker-args |
--force_dropbear | Force using dropbear instead of SSHd | none |
--git-credentials | If True, local .git-credentials file is sent to the interactive session. | false |
--init-script | Specify a BASH init script file to be executed when the interactive session is being set up | none or previously entered BASH script |
--jupyter-lab | Install a JupyterLab on interactive session | true |
--keepalive | If set, enables transparent proxy that keep sockets alive to maintain the connection to the remote resource | false - do not use transparent socket for mitigating connection drops |
--packages | Additional packages to add. Supports version numbers. Example: --packages torch==1.7 tqdm | Previously added packages. |
--password | Set your own SSH password for the interactive session | A randomly generated password or a previously used one |
--project | Set the project name to the interactive session task | DevOps |
--public-ip | If true, register the public IP of the remote machine (if you are running the session on a public cloud) | false - Session runs on the machine whose agent is executing the session |
--queue | Select the queue to launch the interactive session on | Previously used queue |
--queue-excluded-tag | The queue option list will exclude queues with specified tags. See the tags parameter in the queues.create API call | none |
--queue-include-tag | The queue option list will include only queues with specified tags. See the tags parameter in the queues.create API call | none |
--remote-gateway | Specify a gateway IP to pass to the interactive session, if an external address needs to be accessed | none |
--remote-ssh-port | Set the remote SSH server port, running on the agent's machine | 10022 |
--requirements | Specify requirements.txt file to install when setting the interactive session. | none or previously used requirements (can be overridden by calling --packages) |
--session-name | Set the name of the interactive session Task | none |
--session-tags | Add tags to the interactive session for increased visibility | none |
--shell | Open the SSH session directly. Notice, quitting the SSH session will not shut down the remote session | none |
--shutdown, -S | Shut down an active session | Previous session |
--skip-docker-network | Don't pass the --network host flag to the Docker that is launching the remote session. See Networking using the host network | false |
--store-workspace | Upload/Restore remote workspace folder and extract it into the next session. Use with --continue-session to continue your previous work from your exact container state | none |
--upload-files | Specify local files/folders to upload to the remote session | none |
--user-folder | Specify the path for the session's remote base folder for the session | Home folder(~/) or previously entered user folder path |
--username | Set your own SSH username for the interactive session | root or a previously used username |
--verbose | Increase verbosity of logging | none |
--version | Display the clearml-session utility version | N/A |
--vscode-extensions | Install additional VSCode extensions and VSCode python extensions (example: ms-python.python,ms-python.black-formatter,ms-python.pylint,ms-python.flake8) | none |
--vscode-server | Install VSCode on interactive session | true |
--vscode-version | Set VSCode server (code-server) version, as well as VSCode python extension version <vscode:python-ext> (example: "3.7.4:2020.10.332292344") | 4.14.1:2023.12.0 |
--yes, -y | Automatic yes to prompts; assume "yes" as answer to all prompts and run non-interactively | N/A |